Drafty doors waste energy and let in dust. Here's how to install weather stripping in under an hour — including the prep step most people skip.
If you've ever felt a cool draft slip past your front door on a foggy San Diego morning, you've already met the problem weather stripping is designed to solve. It's one of those small, quiet failures that doesn't seem urgent — until you notice your living room is dusty by Wednesday or your energy bill has crept up for no obvious reason.
The good news: weather stripping a door is one of the cheaper, faster home upgrades you can do. The not-so-good news: a sloppy install peels off within a few months, and you end up doing it twice. Here's how to do it once, properly.
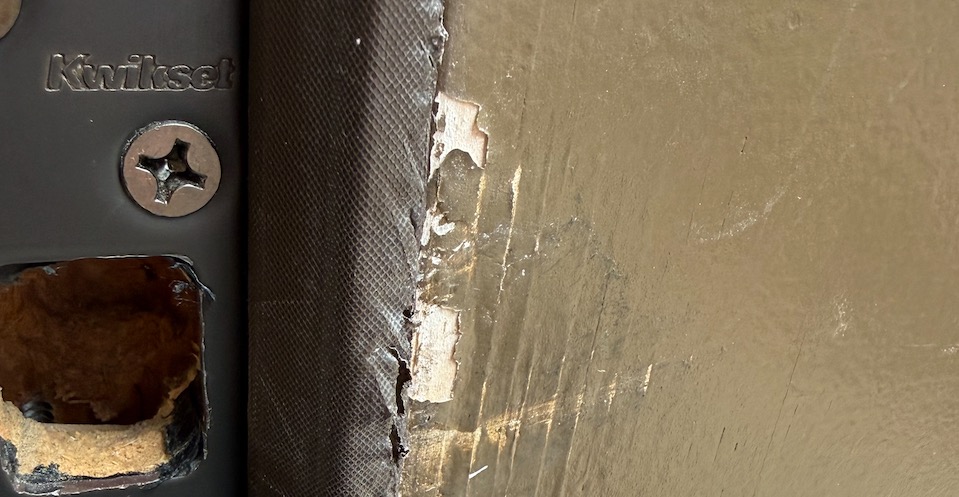
A worn or missing seal around an exterior door does more than let in a draft. It wastes conditioned air, lets in dust and pollen (a real factor in neighborhoods like Carmel Valley, Del Sur, and Rancho Peñasquitos — ZIP codes 92127, 92130, 92129 — where coastal breezes carry plenty of both), and leaves a gap that bugs find quickly.
A typical front door loses 5–10% of its seal performance every year through compression and UV exposure. After five to seven years, most stock weather stripping is doing very little. Replacing it is a 30–60 minute job that pays back almost immediately in comfort and lower energy use.
A tape measure, a utility knife or sharp scissors, a clean rag, isopropyl alcohol, and a roll of weather stripping appropriate for your door. The three most common types: adhesive foam tape (cheap, easy lasts 2–3 years), V-strip / tension seal (more durable, ideal for the latch side and top jamb), and a door sweep (for the gap at the threshold). Most exterior doors benefit from a combination — V-strip on the jambs and a sweep at the bottom.
Coastal salt air and afternoon sun are tough on door seals. South- and west-facing doors take the most beating — UV breaks down rubber and adhesive faster than most people expect. If a door gets full afternoon sun, plan to inspect its weather stripping each spring and budget to replace it every few seasons rather than every five-plus years.
If you're already pulling out the alcohol and the utility knife, it's worth checking every exterior door in the house at the same time — front, back, garage entry, side patio. Stripping tends to fail on a similar timeline across a home, and doing them in one pass takes about a third of the time of doing them one at a time.
For Livd members, weather stripping is one of those small upgrades that quietly improves day-to-day comfort — and one we often handle as part of a larger spring or fall walkthrough. We bring the right products, prep the surfaces properly, and check every exterior door at the same time so the whole house gets sealed in one visit.
Already a Livd member? Add "weather stripping" to your task list in the Livd app and we'll take care of it on your next scheduled visit.
Not a Livd member yet? Schedule your free home walkthrough at livdhomes.com — we'll assess what your home needs and build a proactive maintenance plan to get it all handled.